Author Archives: Hs

What are memory straps and why should I modifying them – AMD overclocking for Ethereum mining

Modifying the so-called memory straps is the most basic customization to gain more performance/mining speed. I explain how to do it in the Sapphire RX570 overclocking post. The goal of modifying the memory timings is to increase memory transferrates at lower latencies.

What are memory timings and what do they do?

The memory modules on a graphic card work at a given clock speed measured in megahertz (MHz). Where each hertz is a cycle in which the memory has time to do work (calculations). The timing measures the chips delay doing work internally before passing the data forward. So even though a memory chip is working at high clock speeds, the work it does internally is limited due to the delays that are given by the memory timings. A chip working at 2000MHz with slow timings (large delays) can perform worse than a chip with 1500MHz and fast timings (short delays).

When the timing does not match a certain range for a given clock speed, the memory can run into trouble and generate memory errors and miscalculations. While memory errors do not harm the hardware, it can lead to faulty calculations of your mining software, thus in rejected shares.

Changing the memory timings is straight forward as the only thing you have to do is to modify the bios by copying the tighter and faster timings of the lower clock speeds. For example, the timing from the 1500MHz clock speed is used at 1625, 1750 and 2000MHz. That results in higher transfer speeds of data from and to the GPU. And therefore increases the hashrate of the mining software.

Source: https://www.reddit.com/r/EtherMining/comments/68ik56/eli5_please_explain_memory_straps_and_some/
Overclocking Sapphire NITRO+RX570 for Ethereum Mining

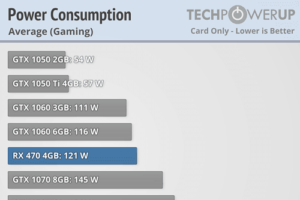
AMD just released a new series of GPUs the RX570 and RX580 a couple of weeks ago. Those are upgraded versions of the RX470/RX480.  The mining community was anticipating the new RX5xx series; however, those two new models received mixed reviews. The reason is that they have a higher power consumption while producing the same hashrate which makes mining less effective (longer ROI). But there is a solution for that.

Power consumption comparison

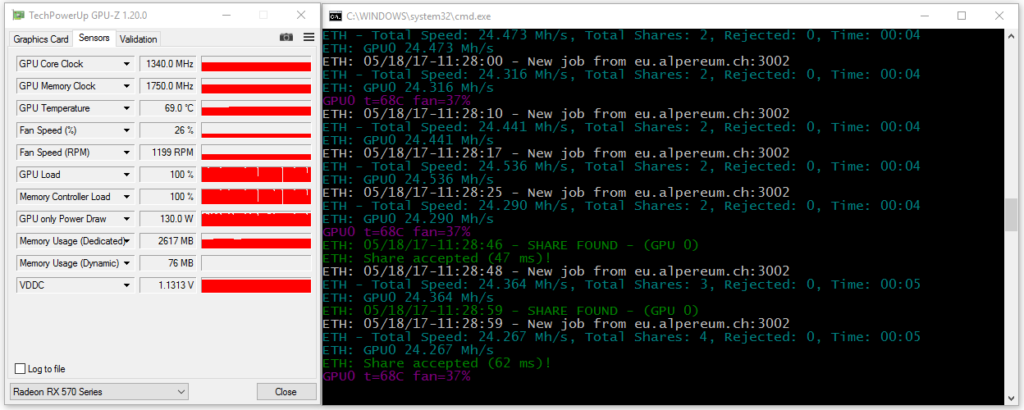
In the following, I’ll explain how to tweak the BIOS of an RX 570 on Windows 10 x64 and present the results. I used the Sapphire NITRO+ Radeon RX 570 4GB card. From a stock RX 570, you can expect an Ethereum hashrate between 22-24 MH/s @130W as can be seen in the screenshot below.

GPU sensor values and Ethereum mining hashrate stock BIOS

Preparation

Before we start you need to download the following drivers/tools:

Step 1 – Driver

  • Uninstall old AMD Driver and restart (maybe it works with other driver versions, I performed the steps with 17.4.4)
  • Install AMD Driver 17.4.4 and don’t do the restart at the end of the setup.
  • Run the Pixel Clock Patcher executable atikmdag-patcher.exe.
  • If all limits are found, click “Yes” to patch and sign. If a limit is not found or if multiple matches are found, the patcher needs to be updated.
  • Reboot

Step 2 – BIOS backup

  • Unzip atiflash_274.zip.
  • Change to the folder where you unzipped the files to and run ATIWinflash.exe as administrator.
  • Before you start flashing a new VBIOS, make sure to save a backup of your original ROM! In case of a bad flash, or bad settings, you can revert to your original ROM.
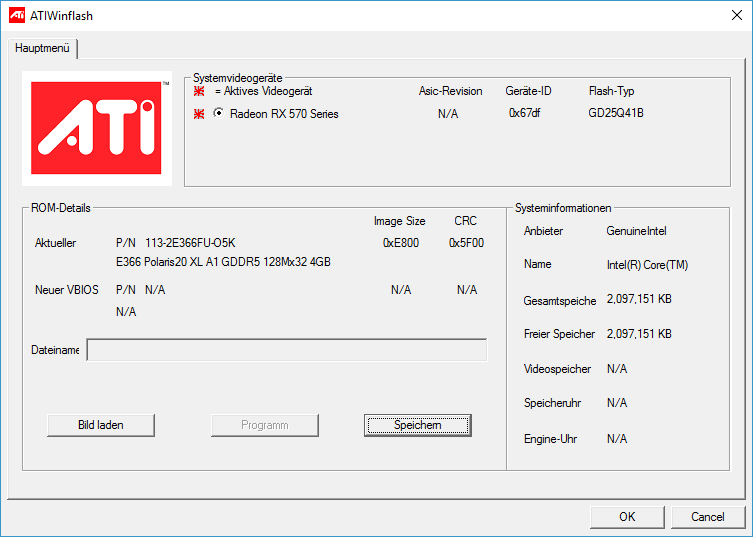
  • By using ATIWinFlash, choose the card you want to create a backup for. Then click on the Save/Speichern button to make a backup and save it to a location of your choice. I named it rx570_original.rom.

Backup original BIOS

Step 3 – BIOS customization

  • In this step, we want to customize the memory straps (timings) of the GPU in the BIOS. If you’re interested you can find an explanation why we want to do that in this post.
  • It is important to know that not every RX570 has a memory chip from the same supplier. Hence, different parameters for the memory strips are needed.
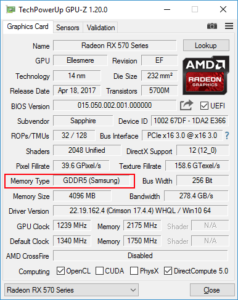
  • My card has SAMSUNG memory, you can verify the memory chip supplier by using GPU-Z (screenshot below).

GPU-Z memory type


  • Run PolarisBiosEditor.exe.
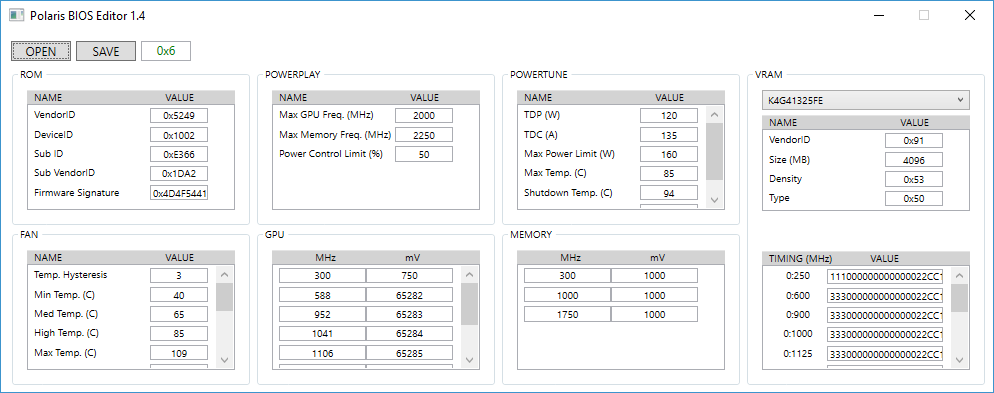
  • Click on the OPEN button and choose the rx570_original.rom from step 2. It should look like in the picture below.

Stock BIOS in Polaris BIOS Editor

  • Down right is a table with timings, for Samsung memory copy the value from 0:1750 to 0:1900 and 0:2000.
  • Click on the SAVE button and choose a name for the modded BIOS e.g. rx570_custom1750.rom.

Step 4 – Flash the modded BIOS

  • Run the ATIWinflash.exe again as in step 2.
  • Click on the Bild laden/Load button and select the modded bios that we created in step 3 (e.g. rx570_custom1750.rom). Important: if you have multiple GPUs in your computer make sure that you select the right one. 
  • Hit Programm. Your desktop will freeze while the ROM is written to the card. After that, you are prompted to restart your machine. Click yes.
  • After restarting your card runs with the new VBIOS ROM.

Step 5 – Tweak parameter

  • In this step, we want to tweak GPU clock, memory clock, and voltage.
  • In order to monitor the Ethereum hashrate, you should now start your favorite mining tool. I use Claymore’s Miner v9.3.
  • In parallel start Sapphire TRIXX.

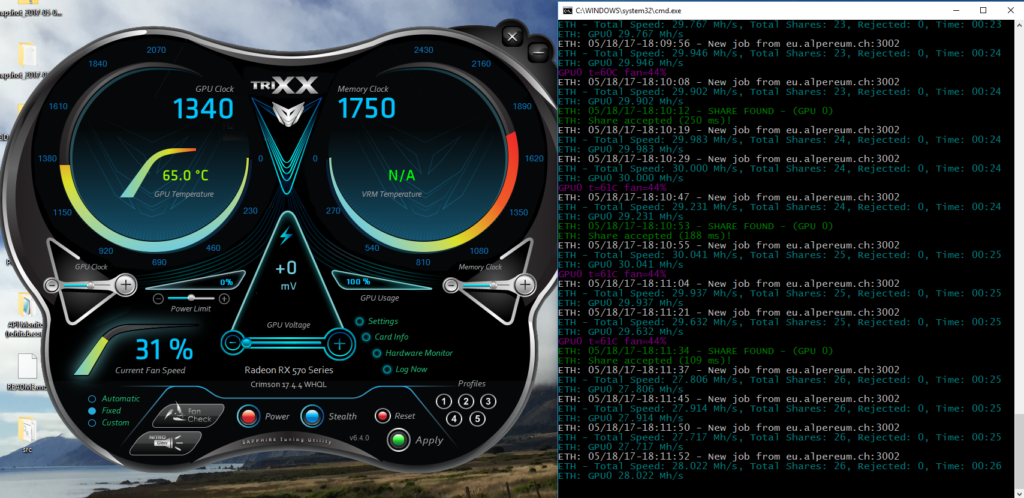
Sapphire TRIXX and Claymore miner

  • Now increase the memory clock in 50 MHz steps and click apply after each step. You should that see the mining hash rate increases.
  • If you go too high the hash rate will decrease or the screen freezes (in that case reboot and stay below the clock rate).
  • If you found a sweet spot you can play around with the GPU clock and decrease the voltage.
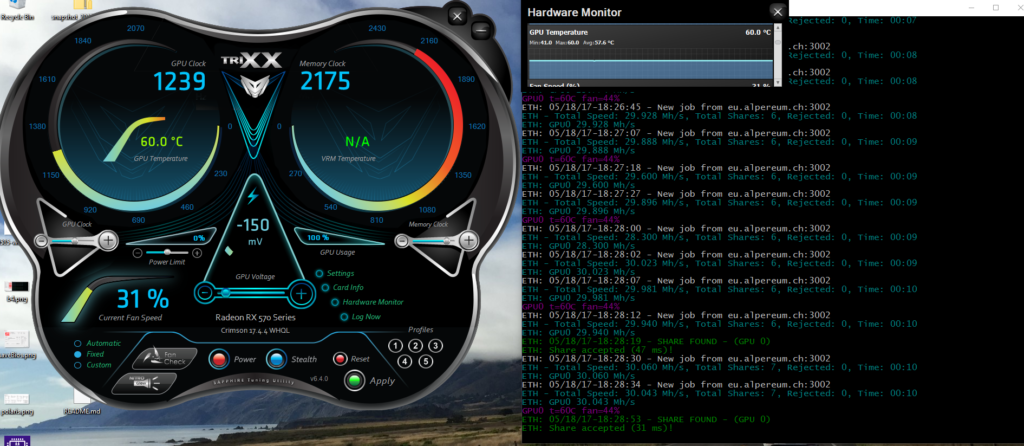
  • For my card 1239 GPU clock / 2175 memory clock / -150mV works best, I’ll get a bit over 30 MH/s (if I don’t use the computer) at 100-105W (according to TRIXX).

Sweet spot 1239/2175/-150

  •  Save your best config as a profile. After each reboot you just have to load the profile, click apply and start mining!

I hope you liked this article. If it helps you my tip jar is available at 
0x7AaBa7974fBeE2e8EBcE16A52718E389EAAD7bd3
Thanks for reading and happy mining!!!


Where to buy Ether (Ethereum)

Update 06/07/17

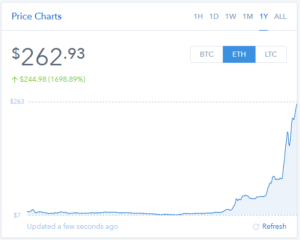
The ethereum spring continues today, with the currency rising nearly 10% to reach a current trading price of $267 while its market cap is seemingly headed for $25 billion, a market cap bitcoin had just two or three weeks ago.

The name of the cryptocurrency which “fuels” Ethereum is Ether. There are basically two ways to acquire it. You could mine it with your own computer which is not the scope of this article or exchange it with fiat currency/bitcoin. Why should you invest in Ethereum? The following figures show the increasing exchange rate over the last few month.

May 14, 2017

June 7, 2017

June 17, 2017

December 3, 2017

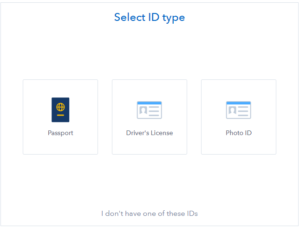
There are a couple of exchanges that you can use to get a hold of your first Ether. I found Coinbase to be the easiest solution if you are a beginner. I personally used it to buy my first Ether. The process is straightforward. The first step is to verify your identity. If you’re a US citizen you can use your US state-issued ID such as a Drivers License or Identification Card. European citizen can use their Passport, Identification Card or Drivers License.

This is how the Coinbase verification process looks like. In the first step, you choose the type of ID that you want to use for verification. In the second step, you choose an upload method. If you don’t have a webcam connected to your computer, you can use the mobile camera upload method.

Verification - Step 1 Verification - Step 2

After a successful verification, you can buy your first Ether. Coinbase offers two payment methods, credit/debit card or bank account. The credit card fee is higher with 3.99% compared to 1.49% when buying via bank account, but you can start instantly. I used my credit card because a bank account needs to be verified first which takes a few days. Credit card sales are instant. If you want to try Coinbase and get 10$ for free (buy for $100 USD or more), click on the Coinbase logo.

Congratulations, now you can call yourself a crypto investor!